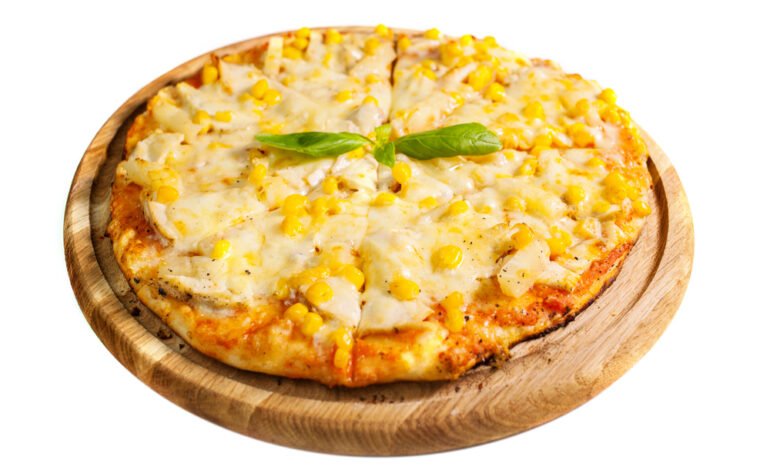
Corn Pizza Recipe
Introduction:
Pizza is a universal favorite, loved for its endless customization options and delightful combination of flavors and textures. Among the myriad of pizza variations, corn pizza stands out for its unique blend of sweet and savory elements. The juicy kernels of corn add a burst of sweetness that perfectly complements the tangy tomato sauce and rich cheese, creating a harmonious balance that’s irresistible. In this blog, we’ll explore the origins of corn pizza, dive into the essential ingredients, and provide a detailed step-by-step recipe with pro tips to help you create the perfect homemade corn pizza. Whether you’re a pizza aficionado or a novice cook, this guide will equip you with the knowledge and confidence to craft a pizza that’s sure to impress.
About Corn Pizza Recipe:
Corn pizza is a delightful twist on the classic pizza, incorporating sweet corn kernels into the topping mix. This variant is particularly popular in regions where corn is a staple ingredient, offering a fresh and slightly sweet flavor profile that contrasts beautifully with traditional pizza toppings. Corn pizza is not only delicious but also visually appealing, with the bright yellow kernels adding a pop of color to the dish. It’s a versatile pizza that can be customized with additional toppings like bell peppers, onions, and even spicy jalapeños to suit your taste preferences.
ingredients:
For the Pizza Dough:
- 2 1/4 teaspoons active dry yeast (1 packet)
- 1 cup warm water (110°F/43°C)
- 2 1/2 cups all-purpose flour
- 1 teaspoon sugar
- 1 teaspoon salt
- 2 tablespoons olive oil

For the Toppings:
- 1 cup sweet corn kernels (fresh, canned, or frozen)
- 1 cup pizza sauce (store-bought or homemade)
- 2 cups shredded mozzarella cheese
- 1/2 cup sliced bell peppers (any color)
- 1/2 cup thinly sliced red onion
- 1/2 cup cherry tomatoes, halved
- Fresh basil leaves, for garnish
- 1 teaspoon dried oregano
- 1/2 teaspoon red pepper flakes (optional)
- Olive oil, for drizzling
Instructions:
1: Prepare the Pizza Dough:
- Activate the Yeast: In a small bowl, combine the warm water and sugar. Sprinkle the active dry yeast over the water and let it sit for about 5-10 minutes until it becomes frothy, indicating that the yeast is active.
- Mix the Dough: In a large mixing bowl, combine the flour and salt. Make a well in the center and add the yeast mixture and olive oil. Stir with a wooden spoon or dough hook until the mixture comes together.
- Knead the Dough: Turn the dough out onto a floured surface and knead for about 8-10 minutes until it becomes smooth and elastic. If using a stand mixer, knead on medium speed for about 5-7 minutes.
- Let the Dough Rise: Place the dough in a lightly greased bowl, cover with a damp cloth, and let it rise in a warm place for about 1-1.5 hours, or until it has doubled in size.
2: Prepare the Toppings:
- Prepare the Corn: If using fresh corn, boil the corn kernels for about 5 minutes until tender. If using canned or frozen corn, drain and rinse (for canned) or thaw (for frozen) as needed.
- Slice the Vegetables: Thinly slice the bell peppers, red onion, and cherry tomatoes.

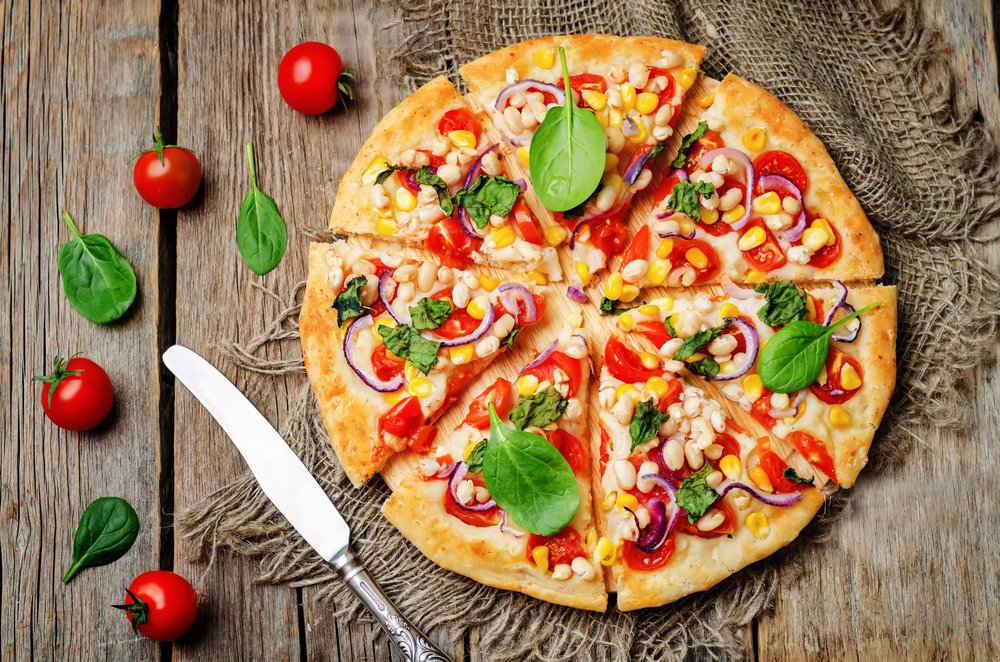
3: Assemble the Pizza:
- Preheat the Oven: Preheat your oven to 475°F (245°C). If using a pizza stone, place it in the oven to heat up.
- Roll Out the Dough: Punch down the risen dough and turn it out onto a floured surface. Roll it out into a 12-inch circle or your desired shape. Transfer the dough to a parchment paper-lined pizza peel or baking sheet.
- Add the Sauce: Spread an even layer of pizza sauce over the dough, leaving a small border around the edges for the crust.
- Add the Cheese: Sprinkle the shredded mozzarella cheese evenly over the sauce.
- Add the Toppings: Distribute the corn kernels, sliced bell peppers, red onion, and cherry tomatoes evenly over the cheese. Sprinkle with dried oregano and red pepper flakes, if using.
4: Bake the Pizza:
- Bake the Pizza: Transfer the pizza to the preheated oven (or pizza stone) and bake for about 12-15 minutes, or until the crust is golden brown and the cheese is bubbly and slightly browned.
- Finish and Garnish: Remove the pizza from the oven and drizzle with a little olive oil. Garnish with fresh basil leaves.
5: Serve and Enjoy:
- Slice and Serve: Use a pizza cutter to slice the pizza into wedges. Serve hot and enjoy the delightful combination of sweet corn, savory cheese, and fresh vegetables.
- Store Leftovers: Any leftovers can be stored in an airtight container in the refrigerator for up to 3 days. Reheat in the oven or a skillet for best results.
“A little bit of corn can add a whole lot of sweetness to your life, especially on a pizza!” – The Kitchen Khazana
pro tips:
- Perfect Dough: For a chewy and airy crust, make sure to knead the dough well and allow enough time for it to rise properly.
- Prevent Soggy Crust: If you’re using fresh or canned corn, ensure it is well-drained to prevent excess moisture from making the crust soggy.
- Customize Your Pizza: Feel free to add other toppings like olives, jalapeños, or even grilled chicken to make the pizza your own.
- Homemade Sauce: If time allows, make your own pizza sauce with tomatoes, garlic, olive oil, and herbs for a fresher taste.
- Cheese Blend: Experiment with different cheeses like cheddar or gouda along with mozzarella for a unique flavor profile.
conclusion:
Creating a homemade corn pizza is not just about making a meal; it’s about crafting an experience that brings joy and satisfaction with every bite. The combination of sweet corn, tangy sauce, and melty cheese is sure to become a favorite in your household. By following this step-by-step guide and incorporating the pro tips, you’ll be well on your way to mastering the art of making delicious and visually stunning corn pizza. So gather your ingredients, roll up your sleeves, and dive into the delightful world of homemade pizza. Happy cooking and even happier eating!